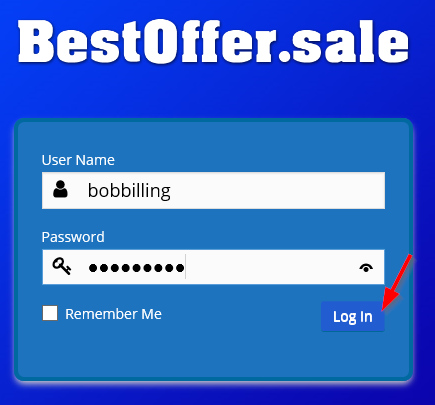
1. Log into your account
Log into your account using your username/email and password that you set up while creating your account.
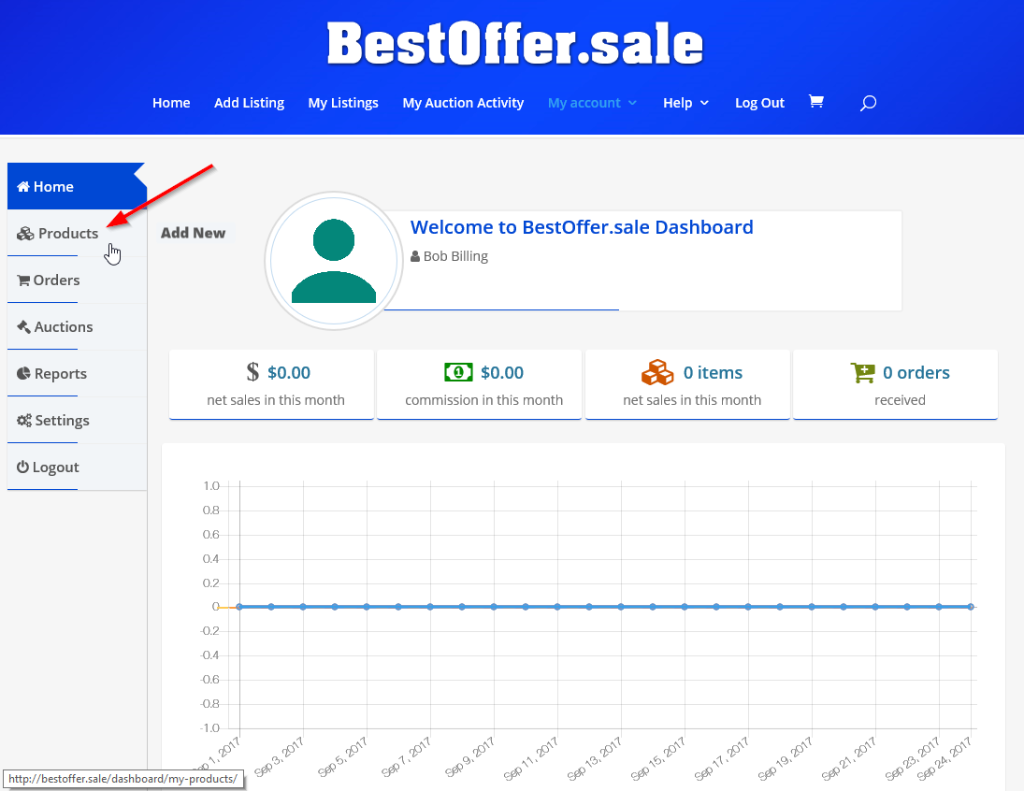
2. Click the Products menu item
Click the products menu item located in the dashboard menu.
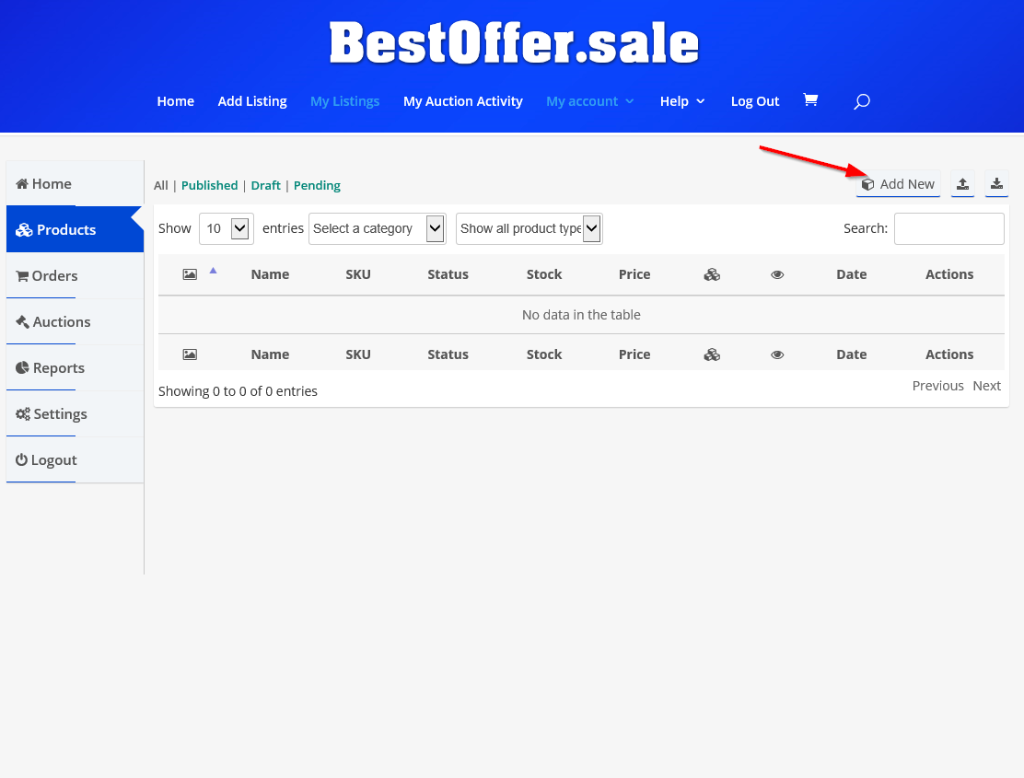
3. Click the Add New button
To create a new product, you must click the Add New button as shown below.
4. Add your product image
Enter your listing title. Add a product image by clicking the large image square. You can also add more images by clicking the + button next to the smaller image square.
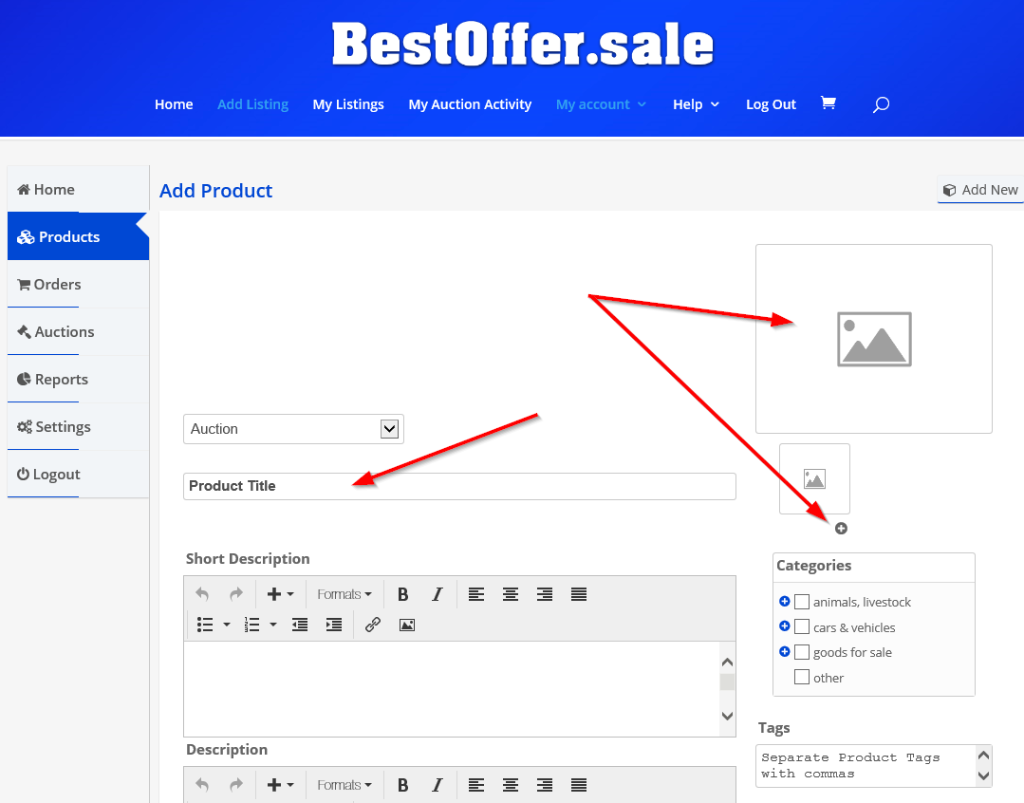
5. Add your product detail
Enter a short description, and a long description for your visitors. You can select categories by clicking the + button next to the category that is closest to your listing. You will be offered more category options within the main category. Please select all categories that apply.
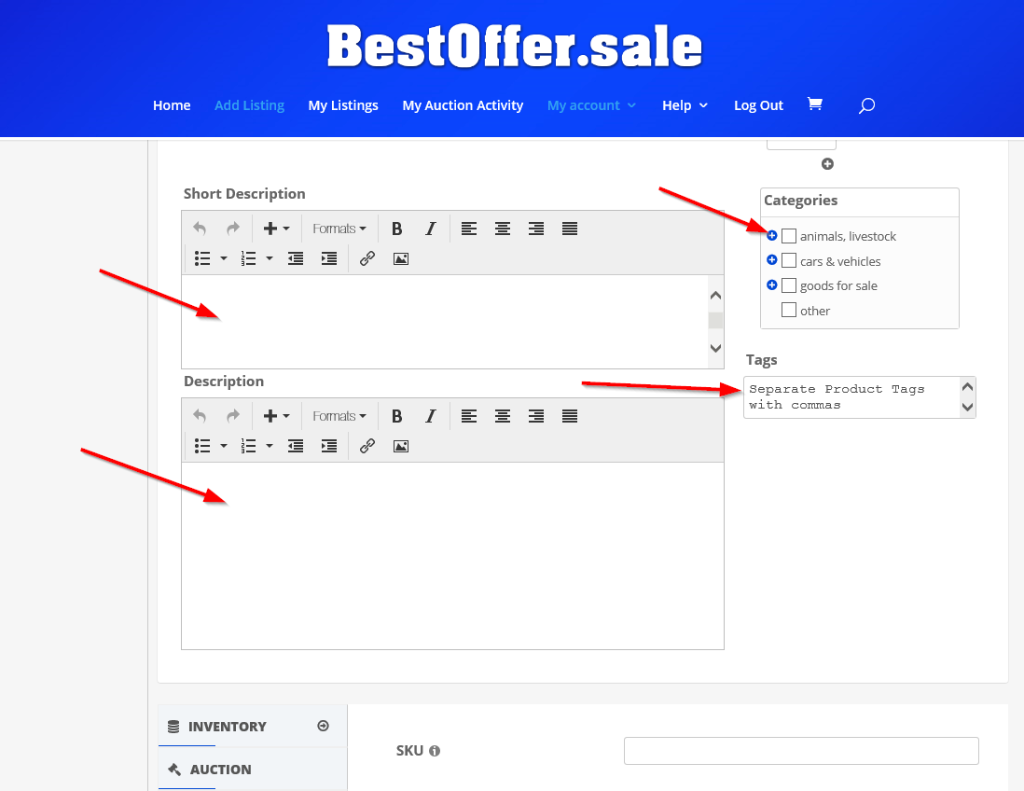
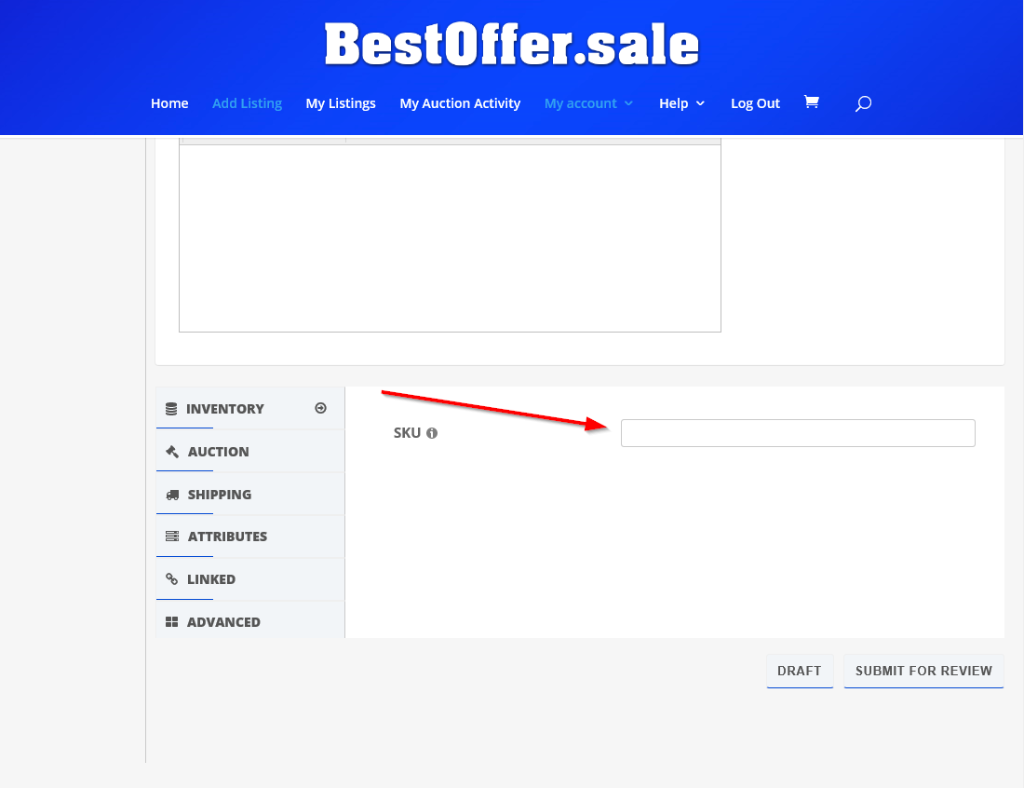
6. Does your product have a SKU?
If you are entering a product that you require a SKU for, please enter it here. A SKU is used in retail to define a unique key to a product. If you are simply uploading something for sale, you will likely not need a SKU.
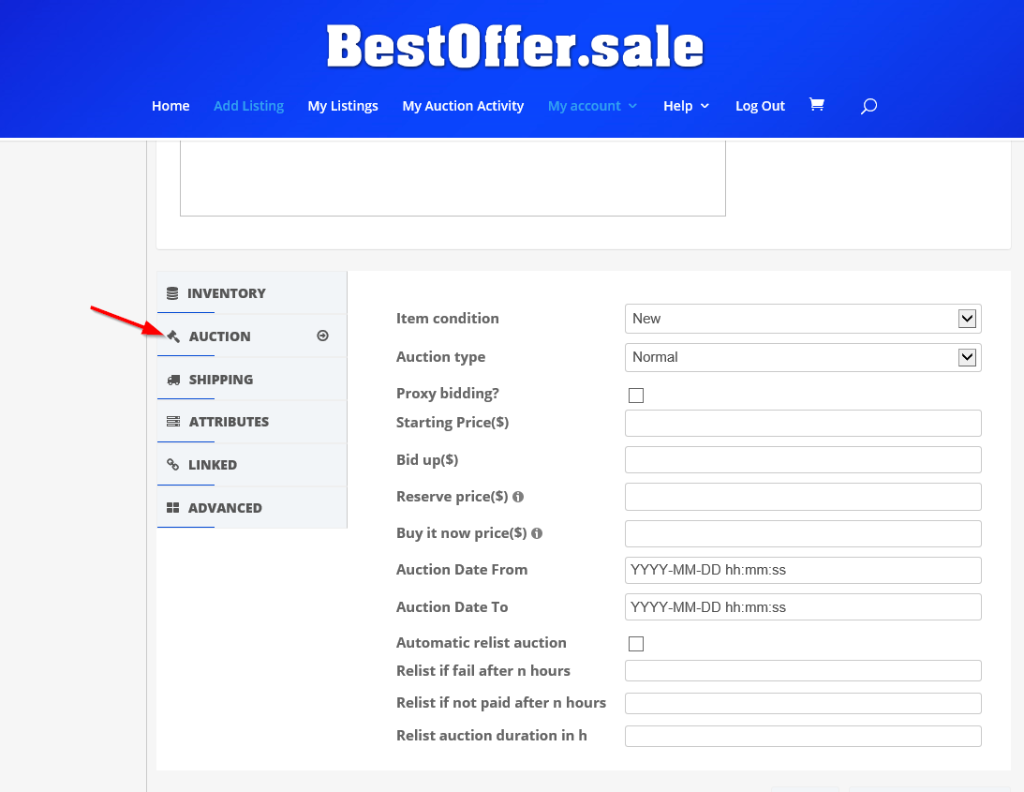
7. Enter your Auction details
You must enter the auction details or your product will not be listed. Item Condition states whether the listing is new or used, select accordingly. There are 2 different auction types. The first is “normal” where the auction is offered to the highest bidder and you can set a price that must be met (reserved price) prior to the sale. The second auction type is “Reverse” where you set a minimum price (reserved price) and bidders decrease the bid until someone wins. The starting price in normal mode is the price you want to start at and could as low as $0. In “Reverse” mode, the starting price is the highest price you think someone might pay for your item. You must choose an auction date start and end. This will determine how long the auction is run for and if you choose the “Automatic relist auction” checkbox, you will need to enter the following three entry boxes.
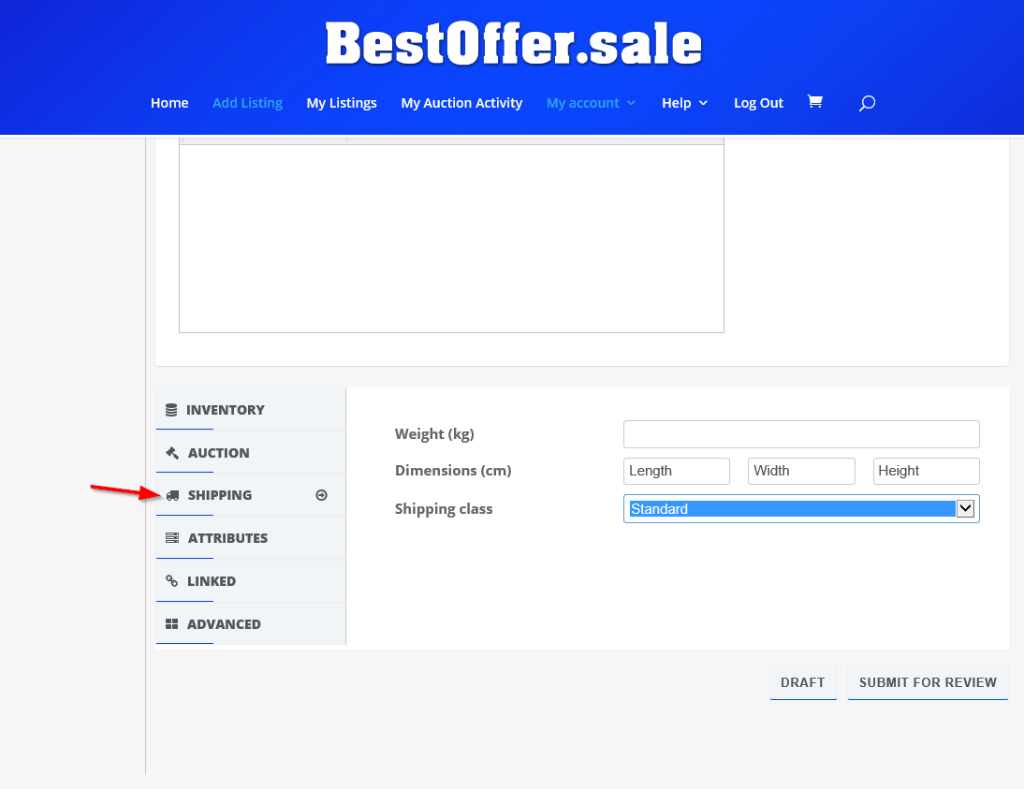
8. Shipping
If you need to add shipping charges. Those charges will be automatically calculated at checkout time for your customer. Simply enter the width, height and weight of the shipping container and choose Standard Shipping.
9. Entering Listing Details
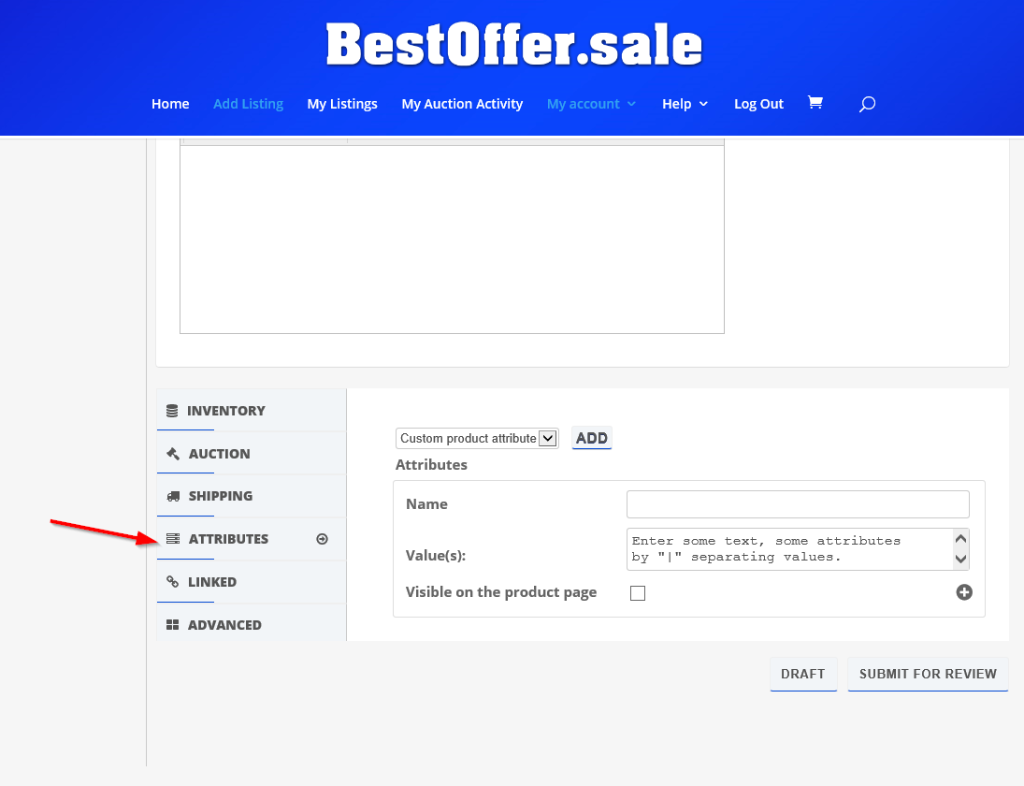
Your listing may have several different colors available. This tab allows you to enter attributes that will be shown to your customer. For example you are selling a t-shirt that has red blue and green colors. You can use this option by entering a NAME in the name field, then adding attributes separated by a | character. This characters keyboard key is located directly above the enter key on your keyboard and can be selected by pressing the SHIFT key, then clicking the appropriate keyboard key. An example of colors would be RED|BLUE|GREEN in the value(s) field. You will likely want your customer to be able to select this attribute prior to checking out and to do so, you should enable the “visible on the product page” check box.
10. Linked Items
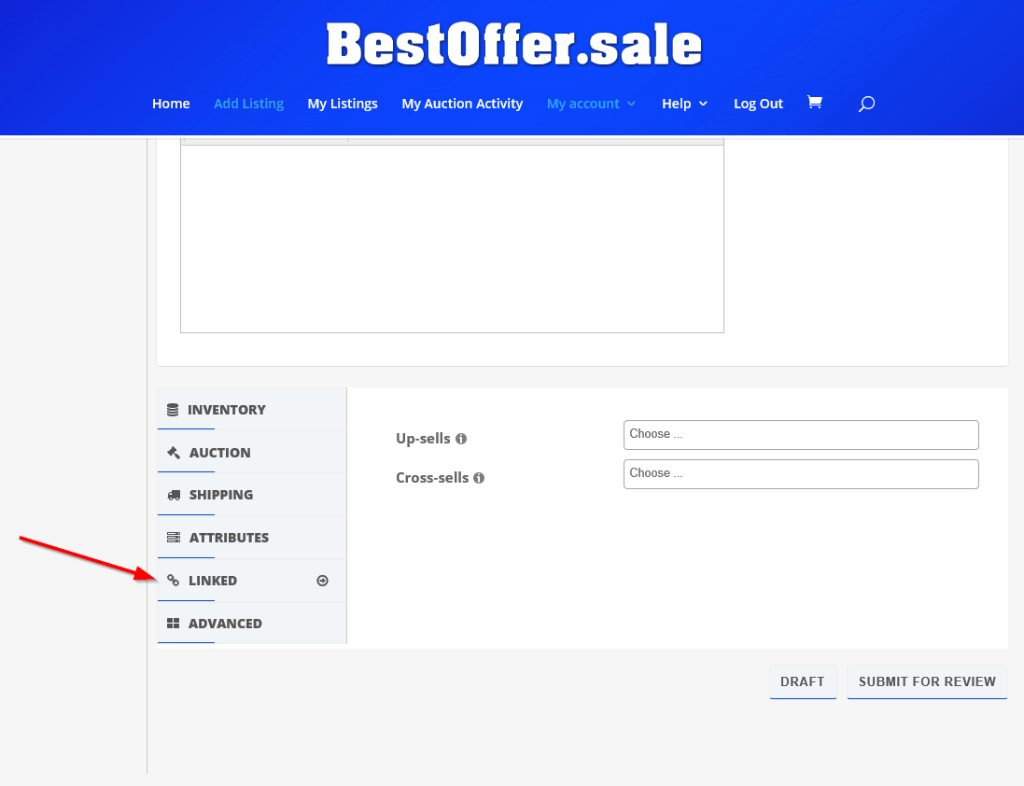
If you already have listings available to your customers, you can choose to link the products to help up-sell them. For example, you are selling a necklace, and also have an earring listing that matches. You would select the earring listing here so that anyone viewing/buying the necklace would also be offered the earrings.
11. Advanced Details
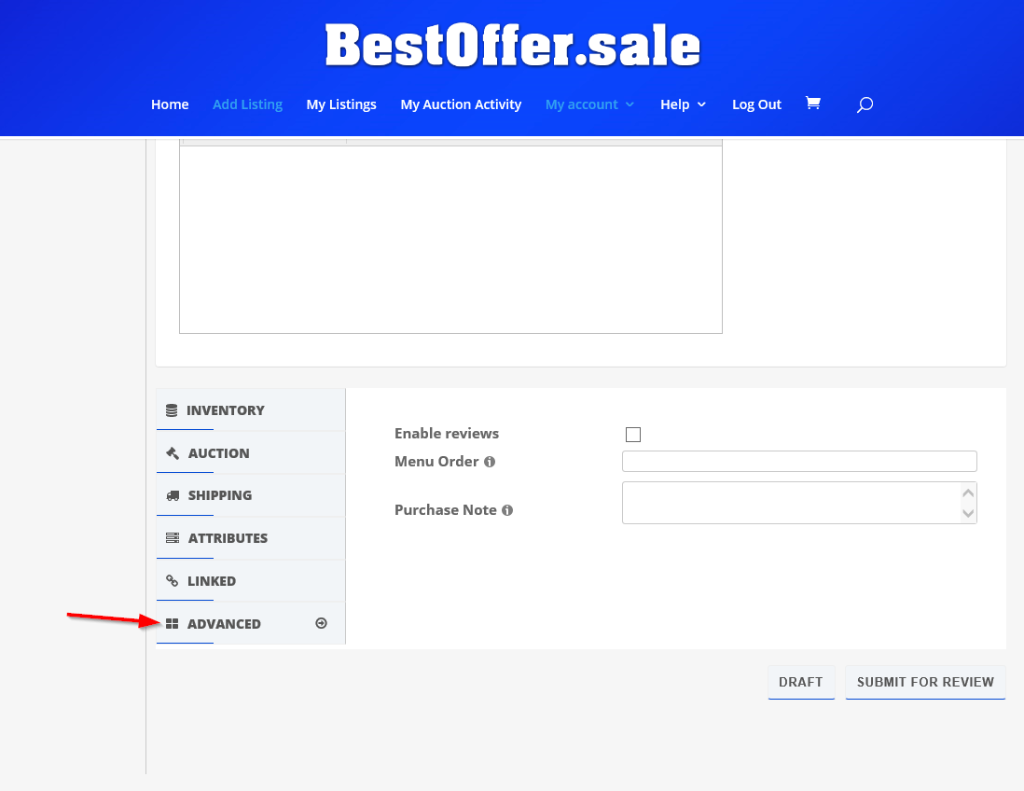
In the advanced section, you can opt to have reviews on your listing to tell other visitors about the quality etc. Also in the advanced section, you can choose the order in which your listing shows up within your listings, and offer a purchase note to the buyer if required.
12. Questions?
You can send questions or comments through the form below. An account administrator will be in touch with you very soon!
